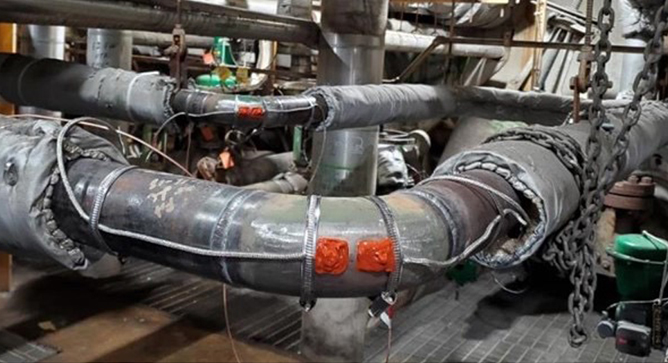
On October 1, 2019, the Pipeline and Hazardous Materials Safety Administration (PHMSA) published amendments to 49 CFR Parts 191 and 192 in the Federal Register, issuing Part 1 of the Gas Transmission Mega-Rule or “Mega-Rule 1”.In advance of Mega-Rule 1, SI developed field protocol and supported leading industry research institutes in validating in-situ Material Verification (MV) methodologies.SI has continued to provide MV consulting support to our clients in response to Mega-Rule 1, ranging from program development and implementation to in-situ field data collection and analysis.
Various sections of Mega-Rule 1 require operators of natural gas transmission pipelines to ensure adequate Traceable, Verifiable, and Complete (TV&C) material records or implement a MV Program to confirm specific pipeline attributes including diameter, wall thickness, seam type, and grade. Operators are now required to define sampling programs and perform destructive (laboratory) or non-destructive testing to capture this information and take additional actions when inconsistent results are identified until a confidence level of 95% is achieved. Opportunistic sampling per population is required until completion of testing of one excavation per mile (rounded up to the nearest whole number).
https://www.structint.com/wp-content/uploads/2021/10/Material-Verification-for-Oil-and-Gas-Clients-Pipeline-Integrity-Solutions.jpg363668Structural Integrityhttps://www.structint.com/wp-content/uploads/2023/05/logo-name-4-930x191-1.pngStructural Integrity2021-10-06 18:23:322023-08-24 16:24:08News & Views, Volume 50 | Material Verification for Oil and Gas Clients
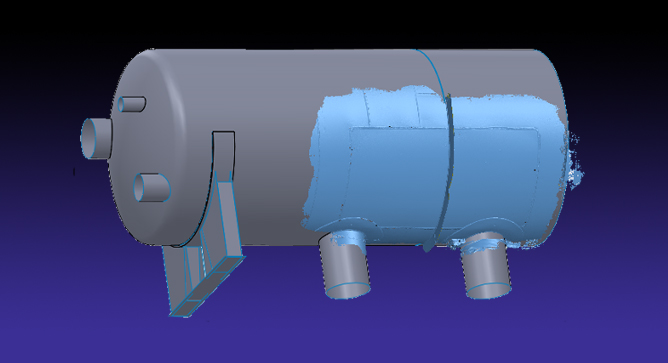
Initial introduction of many of the hydrogen fueling stations to support this rapidly growing demand were installed around 2010. There were many designs of cylinders developed and installed at that time, many with known limitations on the life of the equipment due to the high pressures involved and cyclic fatigue crack growth issues due to hydrogen embrittlement.The designs were often kept relatively simple to lower their costs often with little or no considerations for in-service inspection or potential end of life considerations.Others involved innovative designs with reinforcing wrapping to try to enhance the life of the vessels, but by doing so, these designs limited the access to the main cylinder wall for in-service inspection.
Many of these vessels are now reaching or passing the design life established by ASME.This is resulting in problems for operators of this equipment as some jurisdictions will not allow the vessels to operate beyond the design life without inspection or re-rating of the vessels to extend the fatigue life.SI’s FatiguePRO is a commercial software solution which has been addressing this exact concern for over 25 years.
The integrity of the nuclear reactor pressure vessel is critical to plant safety.A failure of the vessel is beyond the design basis.Therefore, the design requirements for vessels have significant margins to prevent brittle or ductile failure under all anticipated operating conditions.The early vessels in the U.S. were designed to meet Section VIII of the ASME Boiler and Pressure Vessel Code and later Section III.ASME Section III included requirements for more detailed design stress analyses also included a fracture mechanics approach to establish operating pressure-temperature heatup and cooldown curves and to assure adequate margins of safety against brittle or ductile failure incorporating the nil-ductility reference temperature index, RTNDT. This index is correlated to the material reference fracture toughness, KIC or KIa.
Radiation embrittlement is a known degradation mechanism in ferritic steels, and the beltline region of reactor pressure vessels is particularly susceptible to irradiation damage.To predict the level of embrittlement in a reactor pressure vessel, trend curve prediction methods are used for projecting the shift in RTNDT as a function of material chemistry and fluence at the vessel wall.Revision 2 of this Regulatory Guide is being used by all plants for predicting RTNDT shift in determining heatup and cooldown limits and hydrostatic test limits.
EQUIPMENT TESTING AND CERTIFICATION TO ASSESS RISK
By: Katie Braman
Using a risk-based approach derived from various seismic standards from the Institute of Electrical and Electronics Engineers, TRU and BC Hydro will develop a synthetic test motion in three axes, mount the equipment on a triaxial shake table at TRU’s testing partner’s facility, and test at increasing levels until various levels of damage are observed.
TRU Compliance, the accredited product certification body of Structural Integrity Associates, has been awarded a contract to assist BC Hydro in qualifying and better understanding the seismic vulnerability of critical equipment used to control its spillway gates.As part of the larger efforts to seismically upgrade the John Hart, Ladore, and Strathcona dams along the Campbell River system on Vancouver Island, British Columbia, BC Hydro is procuring equipment that allows precise flow control of the water going over the spillway.Reliable equipment is needed to prevent possible overtopping or having uncontrolled water flow through the spillway.
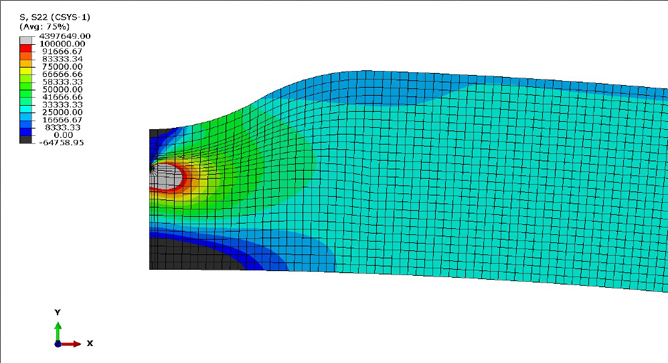
One of Structural Integrity Associates’ (SI) strengths is combining state-of-the-art software with material science expertise to solve difficult structural and mechanical problems. A notable example in recent years is the Aircraft Impact Analysis (AIA) performed by SI for NuScale Power, using the ANACAP concrete material model. With SI’s support, NuScale’s Small Modular Reactor (SMR) building design passed NRC’s comprehensive inspection, bringing NuScale’s SMR technology one step closer to market [N&V Vol. 47 p. 5].
SI’s success in AIA is due not only to our team’s capabilities but also due to the capabilities of our proprietary concrete constitutive model, ANACAP, developed by Joe Rashid, Robert Dunham, and Randy James of ANATECH, now part of SI. Modeling reinforced concrete, which is both nonhomogeneous and anisotropic, is often a challenge in advanced structural analysis. However, ANACAP has a long track record of accurately capturing nonlinear concrete response in structural systems subjected to static, impact, and seismic loads. Its application goes beyond AIA; it has also been utilized in several of SI’s commercial building, bridge infrastructure, nuclear plant, and hydroelectric facility projects.
ANACAP has the ability to account for cyclic degradation, multi-axial cracking, load-rate effects, aging, creep, shrinkage, crushing, confinement, concrete-reinforcement interaction, and high-temperature softening behavior. The combination of these features results in an exceptional representation of concrete intricate behavior. It also leads to more accurate results when compared to standard finite element “built-in” concrete material libraries, all the while being implemented within the same standard finite element formulation.
Structural Integrity Associates (SI) recently attended the PRCI June 2021 Technical Committee (TC) Meetings. SI is also planning to support the upcoming PRCI NDE workshop scheduled for October 2021 as well as future committee meetings. SI will continue to engage and support industry with PRCI.As a researcher for PRCI, SI is pleased to support industry in the development and evaluation of new technology and methods that can enhance pipeline safety and reliability.SI continues to support the development of new tools and analytical methods to help advance crack management, material verification, NDE inspections, and pipeline integrity management and share our experience with PRCI and industry.Please contact us with any questions regarding our involvement or how SI can support your pipeline safety and reliability objectives.
SI Presenting at the 2021 AGA Operations Conference on “Responding to Cracks and Crack-Like Defects for Mega-Rule 1”.
Structural Integrity is pleased to partner with Duke Energy to present on Mega-Rule 1 requirements for the Analysis of Predicted Failure Pressure (192.712).Procedures, tools and practical applications will be presented along with specific case studies.In addition, methods to address additional requirements for evaluating cyclic fatigue will also be presented.This presentation will be at the AGA Fall Operations Conference in Orlando, FL scheduled for October 6, 2021 at 10:45 AM in the Integrity Management track. Additional detail on the event can be found at the following site: www.aga.org/OpsConf2021
https://www.structint.com/wp-content/uploads/2021/10/Oil-and-Gas-Pipeline-Intel-Industry-Regulation-Insights.jpg363668Structural Integrityhttps://www.structint.com/wp-content/uploads/2023/05/logo-name-4-930x191-1.pngStructural Integrity2021-10-06 13:09:482023-08-24 16:25:00News & Views, Volume 50 | Oil and Gas Pipeline Intel
THE PROBLEM A supplier of electromagnetic interference (EMI) components noticed that one of their manufacturer’s components was not performing as well as similar components had previously.The supplier had several theories on the make-up of the component and asked SI to investigate and confirm the material constituents as well as their distribution across the thickness.
THE SOLUTION A small, coiled metallic sample, representative of the latest batch of material received from the manufacturer, was brought to SI’s Materials Laboratory for analysis. The goal of the analysis was to identify the elemental constituents present to help assess composition and also the distribution of the elements through the thickness. The sample was cross-sectioned and examined and documented in a scanning electron microscope (SEM) as shown in Figure 1. Using backscattered electrons (which help distinguish compositional differences) it was clear that the surfaces had a unique composition (dark grey) when compared to the base substrate (light grey).
An elemental map of the cross-section was captured using energy dispersive X-ray spectroscopy (EDS) to identify the elements present across the thickness. The elemental map is provided in Figure 2 and the EDS analysis results are provided in Table 1. The sample was confirmed to comprise mostly of titanium and aluminum, which was expected, but was found to be titanium substrate with cladding of aluminum and silver on the surfaces .
Utilizing this information the supplier was able to engage with the manufacturer to help ensure that the material was being manufactured in a way suitable for the given end-use.
Figure 1. As received image of the metallic component and overall micrograph of the component cross-section red arrows show the cross-section location
Figure 2. Maps showing elemental distribution through the component cross section
Element
Surface A
Base Substrate
Surface B
Carbon
10.2
7.2
Oxygen
1.2
1.6
Sodium
0.7
0.7
Magnesium
0.8
1.1
Aluminum
76.5
0.5
81.8
Silicon
0.3
0.5
0.4
Calcium
0.2
0.3
Titanium
8.4
98.7
4.9
Iron
0.1
0.1
0.5
Silver
1.8
1.5
Elemental mapping is based on compiling extremely specific elemental composition data across an area of a sample. This is typically done in an SEM using EDS analysis. A high resolution image of the area of interest is collected along with the EDS data, and the two are correlated.
[1] The sample was prepared in a carbon-based mounting medium for use in the SEM, so much of the carbon is from sample preparation.
THE PROBLEM A filter was removed from a stator cooling system after pressure differential sensors indicated it may be blocked. The filter was submitted to SI’s Materials Laboratory for analysis to help identify the material blocking it.
Figure 1. The filter shown in the as-received condition
Figure 2. The yellow color is the original appearance of the filter
THE SOLUTION The filter was visually examined and documented in the as-received condition as shown in Figure 1. The submitted sample had a perforated plastic shell that covered an inner filter. The outer plastic was removed to provide access to the filter underneath. Figure 2 shows close images of the filter, which was yellowish-white with much of its surface covered in gray colored debris/deposit.
Figure 3. SEM images of material removed directly from the filter (left) and particles from the evaporated MEK (right) B
A portion of the filter was scraped to remove the deposits. Another portion of the filter was removed and soaked in Methyl Ethyl Ketone (MEK) to remove the debris present on the filter. The solvent evaporated and the remaining particles were collected. Both samples were analyzed in a scanning electron microscope using energy dispersive X-ray Spectroscopy (EDS) to identify the elements present. The results are provided in Table 1. The results indicate that the filter debris was primarily copper oxide. Plant personnel reported that copper contamination could be occurring in the system, so these findings appeared to be consistent with plant information. With their suspicions confirmed, plant personnel were able to move forward with mitigation steps for keeping the filters from becoming blocked.
Element
Material Removed from Filer
Particles from MEK Wash
Carbon
4.9
ND
Oxygen
13.4
18.5
Aluminum
0.2
1.3
Silicon
0.4
4.2
Sulfur
0.1
0.3
Chlorine
0.1
0.1
Chromium
0.3
1.6
Iron
0.4
4.0
Nickel
ND
0.4
Copper
79.7
68.4
Tin
0.4
1.3
Table 1. Filter Material EDS Analysis Results (wt.%)
THE PROBLEM Structural Integrity received a section of an original star member from one of Austin’s Moonlight Towers (Figure 1). The material was suspected to be a ductile or malleable cast iron and the company refurbishing the towers needed to determine a suitable replacement material. SI was asked to perform materials testing on the sample to determine its chemical composition, measure its tensile strength, and evaluate the microstructure to determine the material type.
Figure 1. The star member shown in the as-received condition A
THE SOLUTION A portion of the star member was submitted for tensile testing and quantitative chemical analysis. Based on the compositional analysis, and particularly the carbon content, the star member is a low carbon steel and not a cast iron. The composition is consistent with UNS G10050 or ASTM A29 Grade 1005. The material was found to have a tensile strength of about 50 ksi and a yield strength of about 30 ksi.
A cross-sectional sample from the star member was prepared for evaluation using standard laboratory techniques. The prepared sample was examined using a metallurgical microscope for evaluation of the microstructure, which is shown in Figure 2. The microstructure consisted of perlite, nonmetallic inclusions, and casting voids/flaws in a ferrite matrix. The microstructure is consistent with a low carbon steel and is not indicative of a ductile or malleable cast iron. The microstructure also showed significant deformation, presumably from forming the star shape (Figure 3). It is not clear if the casting voids/flaws present in the material indicate the material was originally cast and then formed, or if they are just indicative of the quality of the material at the time of manufacture (i.e., the component is not a casting).
With the information from this analysis, the company performing the refurbishment was able to select a suitable material to replace the old, original Moonlight Tower star members.
Figure 2. The typical star member microstructure A
Figure 3. Deformation in the microstructure
MOONLIGHT TOWERS The moonlight towers in Austin, Texas, are the only known surviving moonlight towers in the world. They are 165 feet (50 m) tall and have a 15-foot (4.6 m) foundation. A single tower originally cast light from six carbon arc lamps, illuminating a 1,500-foot-radius (460 m) circle brightly enough to read a watch. In 1894, the City of Austin purchased 31 used towers from Detroit. They were manufactured in Indiana by Fort Wayne Electric Company and assembled onsite. When first erected, the towers were connected to electric generators at the Austin Dam, completed in 1893 on the site of present-day Tom Miller Dam. In the 1920s their original carbon-arc lamps, which were exceedingly bright but time-consuming to maintain, were replaced by incandescent lamps, which gave way in turn to mercury vapor lamps in the 1930s. The mercury vapor lamps were controlled by a switch at each tower’s base. During World War II, a central switch was installed, allowing citywide blackouts in case of air raids. (source: Wikipedia)
THE PROBLEM Structural Integrity received several sections of core reinforcing steel from a client performing work at a local university gymnasium (Figure 1). SI’s client needs to have an understanding of the material tensile strength in order to obtain the appropriate replacement material.
THE SOLUTION Cross-sections were removed from each of the five samples and prepared for hardness testing. The hardness testing was performed as follows:
Shimadzu Microhardness Tester (HMV-2) –1.961 N load
Unit calibrated with a 206 Vickers (HV) sample block
Five readings were made on each sample
The five hardness readings from each sample were averaged and used to estimate the approximate UTS, and the material verification results are provided below.
Figure 1. The core reinforcing steel samples in the as-received condition
Sample ID
Average Hardness (HV)
Approximate UTS (ksi)
C1-1
144.2
69
C1-2
147.6
70
C2-1
192.2
89
C2-2
198.6
92
C2-3
169.6
79
HARDENESS VS. TENSILE STRENGTH Hardness is a measure of the resistance to localized plastic deformation induced by either mechanical indentation or abrasion, while ultimate tensile strength is the maximum stress that a material can withstand while being stretched or pulled before breaking. Because hardness can often be measured much more readily than tensile strength, it is convenient to use hardness to estimate tensile strength. Hardness correlates linearly to ultimate tensile strength through the empirical (although theoretically explained) equation H=UTS/k. Tensile strength estimates based on hardness should be used for guidance only and should not be used as set reference values. Some material conditions, especially cold work, can change the relationship between the tensile strength and hardness profoundly.
We may request cookies to be set on your device. We use cookies to let us know when you visit our websites, how you interact with us, to enrich your user experience, and to customize your relationship with our website.
Click on the different category headings to find out more. You can also change some of your preferences. Note that blocking some types of cookies may impact your experience on our websites and the services we are able to offer.
Essential Website Cookies
These cookies are strictly necessary to provide you with services available through our website and to use some of its features.
Because these cookies are strictly necessary to deliver the website, refusing them will have impact how our site functions. You always can block or delete cookies by changing your browser settings and force blocking all cookies on this website. But this will always prompt you to accept/refuse cookies when revisiting our site.
We fully respect if you want to refuse cookies but to avoid asking you again and again kindly allow us to store a cookie for that. You are free to opt out any time or opt in for other cookies to get a better experience. If you refuse cookies we will remove all set cookies in our domain.
We provide you with a list of stored cookies on your computer in our domain so you can check what we stored. Due to security reasons we are not able to show or modify cookies from other domains. You can check these in your browser security settings.
Google Analytics Cookies
These cookies collect information that is used either in aggregate form to help us understand how our website is being used or how effective our marketing campaigns are, or to help us customize our website and application for you in order to enhance your experience.
If you do not want that we track your visit to our site you can disable tracking in your browser here:
Other external services
We also use different external services like Google Webfonts, Google Maps, and external Video providers. Since these providers may collect personal data like your IP address we allow you to block them here. Please be aware that this might heavily reduce the functionality and appearance of our site. Changes will take effect once you reload the page.
Google Webfont Settings:
Google Map Settings:
Google reCaptcha Settings:
Vimeo and Youtube video embeds:
Other cookies
The following cookies are also needed - You can choose if you want to allow them:
Privacy Policy
You can read about our cookies and privacy settings in detail on our Privacy Policy Page.